

1. Launch the Settings app.
Mobile Device Management
Windows
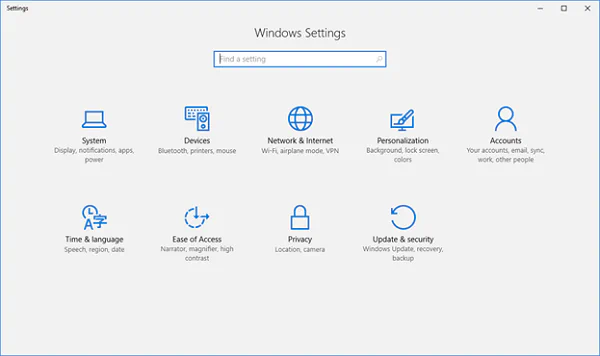
2. Next, navigate to Accounts.

3. Navigate to Access work or school.
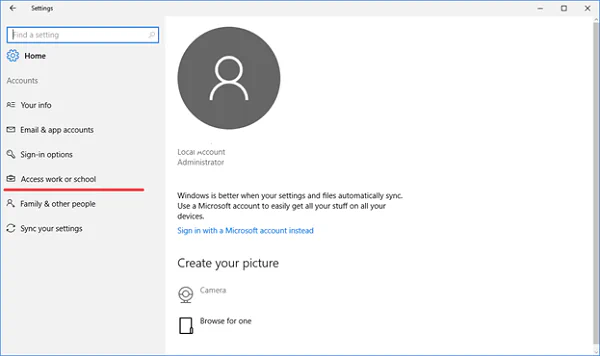
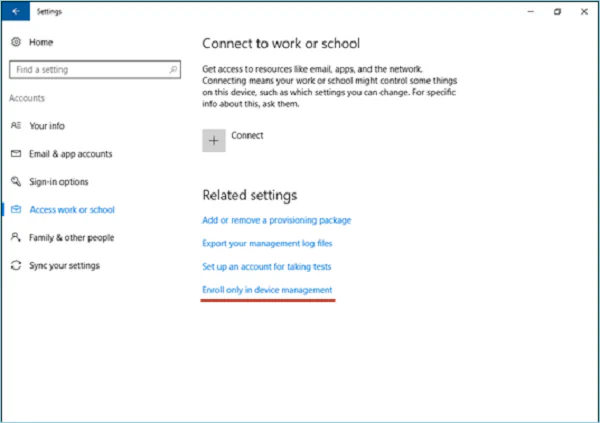
4. Select the Enroll only in device management link.
5. Type in your Gleeson College email address.
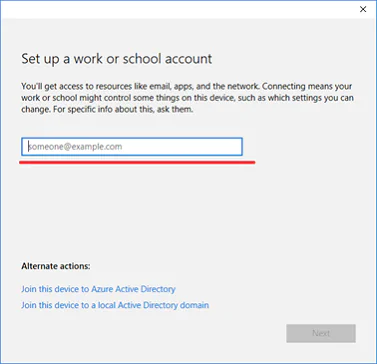
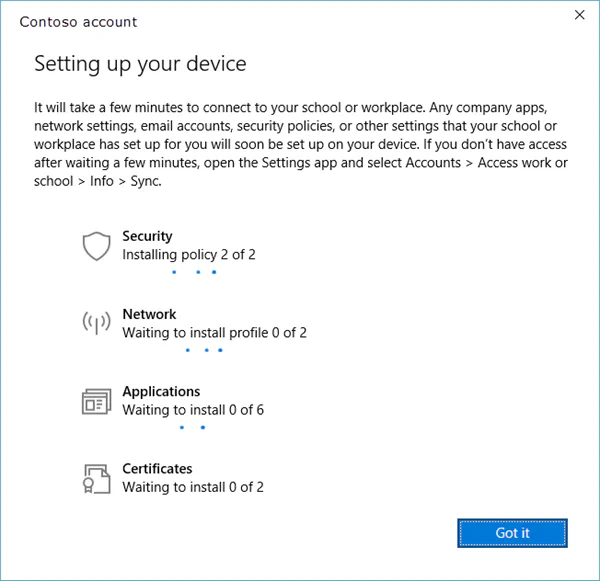
6. Your device will now find the Gleeson College MDM. You will be asked for your password and multi-factor authentication (if set up). You can see the enrolment progress on screen.
Gleeson College Students get access to 1TB of Cloud Storage with OneDrive. Follow these steps to login to OneDrive
Click on the Start Menu and Type OneDrive, click on the OneDrive App.
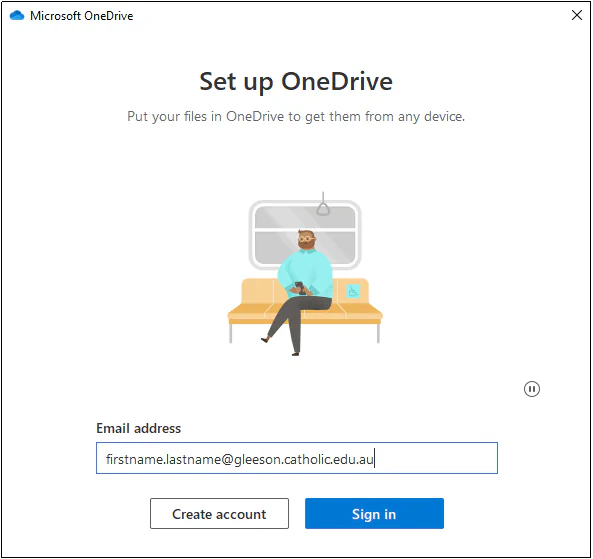
2. Type in your Gleeson Email Address, then click Sign In, when asked, type in your Gleeson Password.
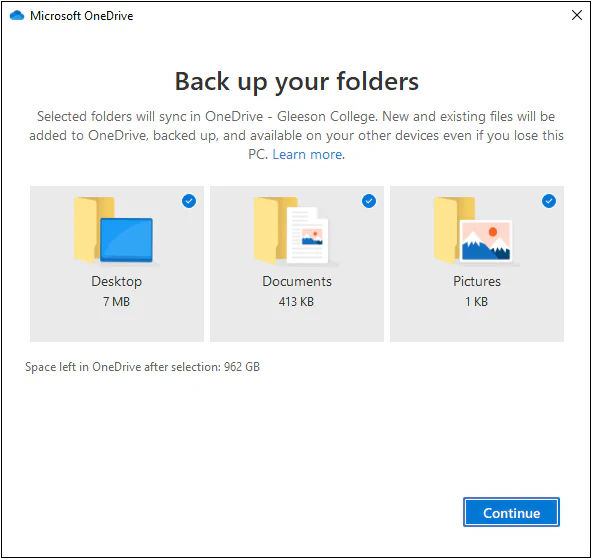
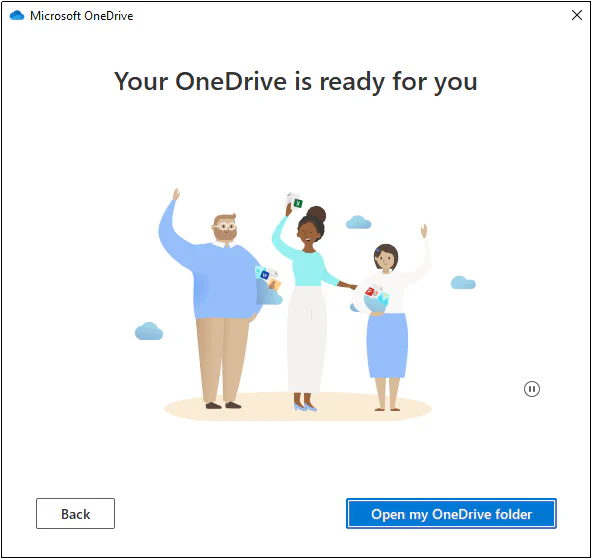
3. Click Next, Continue, Next, Next, Next, Later and then Open my OneDrive folder.
4. You’re all set!
Make sure to save all your school work into your OneDrive so that it’s backed up to the cloud.
Gleeson College Students get a free Microsoft Office 365 license while enrolled at the College. To sign into Microsoft Office follow the steps below:
- Click on the Start Menu and open Microsoft Word
- If prompted, sign into Word using your Gleeson Account.
If not, In the top right corner click on the Sign in button and sign in with your Gleeson College Account (if you are signed in with an account already the account name will appear here)
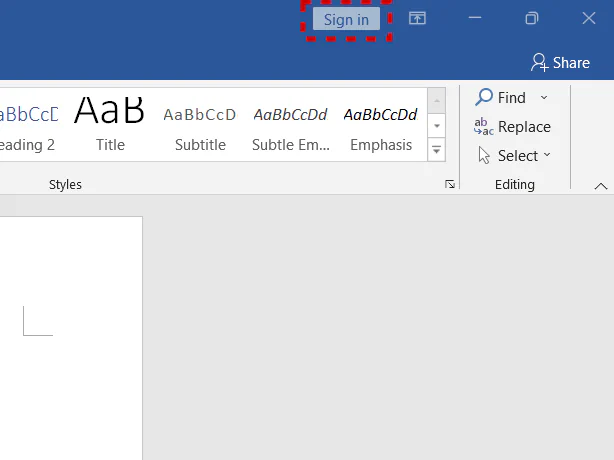
All done! Signing into one Microsoft Office application signs into all of them.
To login to SEQTA visit https://learn.gleeson.catholic.edu.au and login with your Gleeson Account.
Apple
1. Go to Enrol My Mac.
2. Wait while the Company Portal installer .pkg file downloads. Open the installer when it is ready.
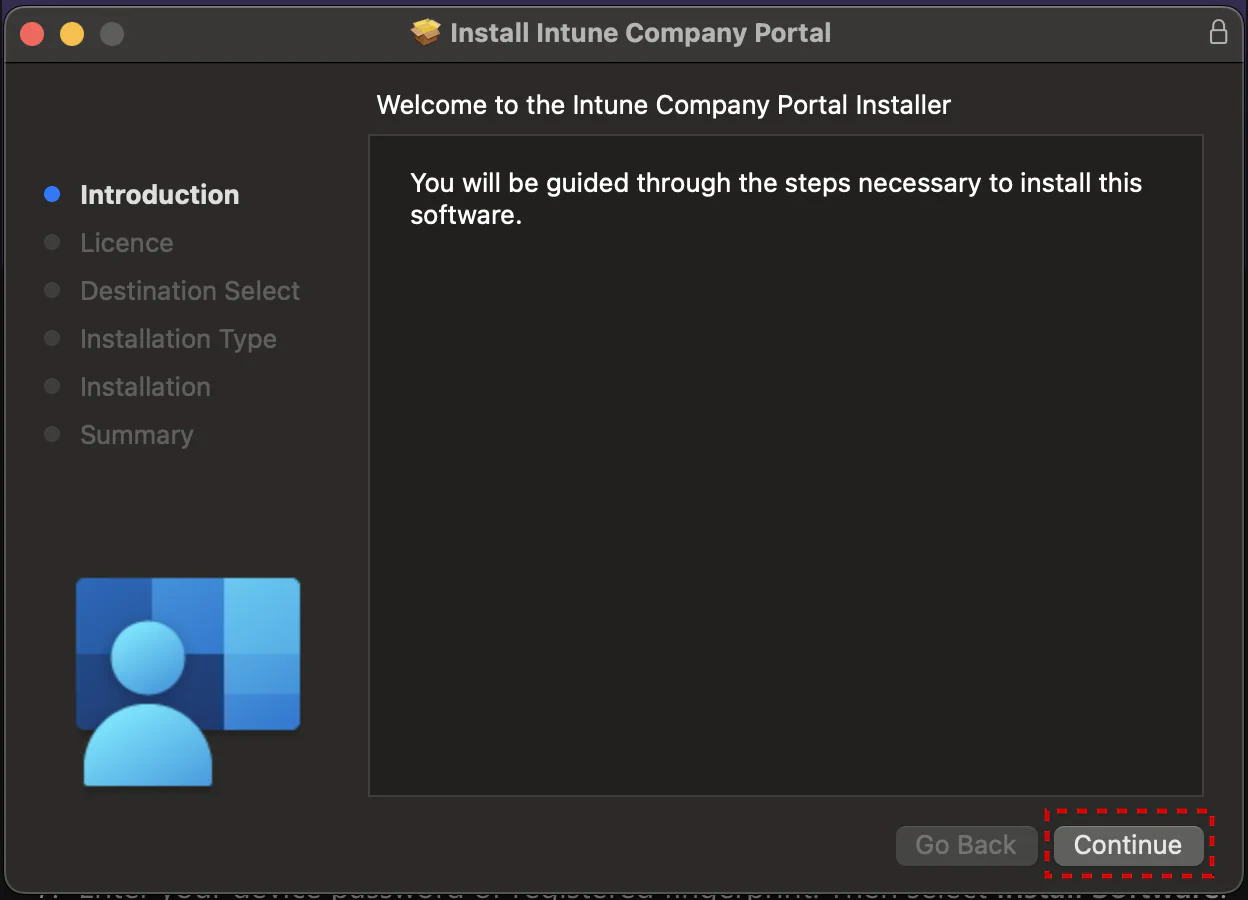
3. On the Introduction page, select Continue.
4. On the License page, read the Microsoft Application License Terms. Select Continue.
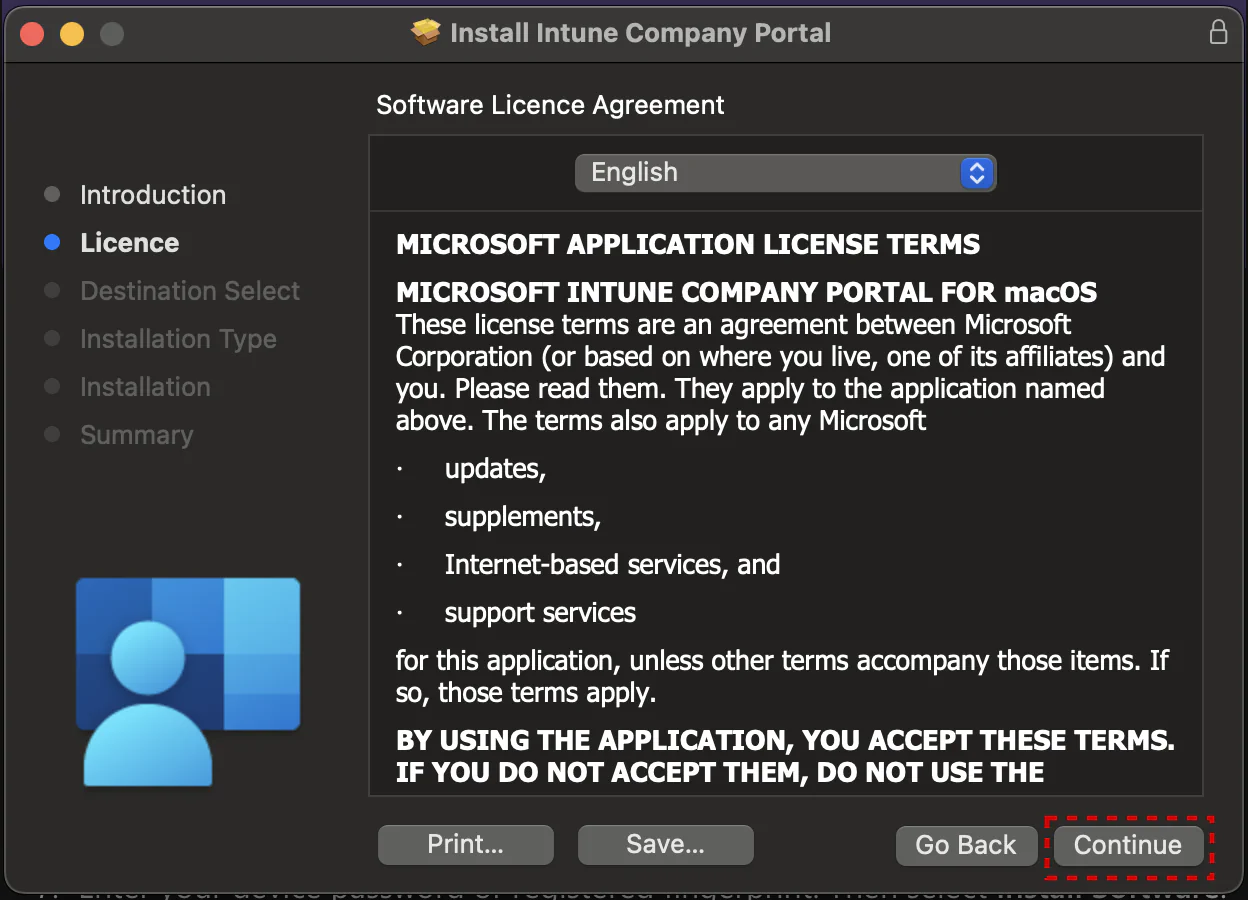
5. Select Agree to agree to the terms of the software license agreement.
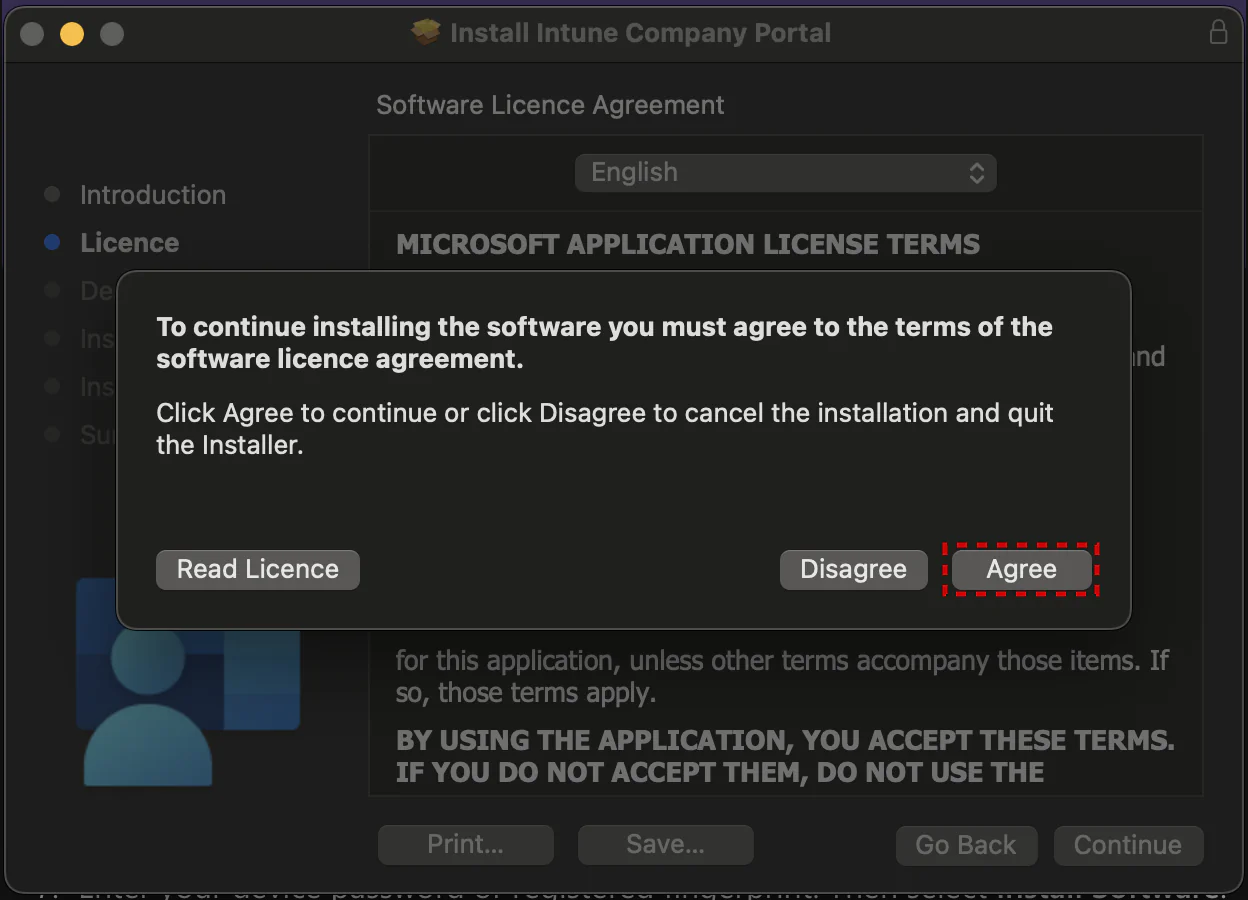
6. On the Installation Type page, select Install.
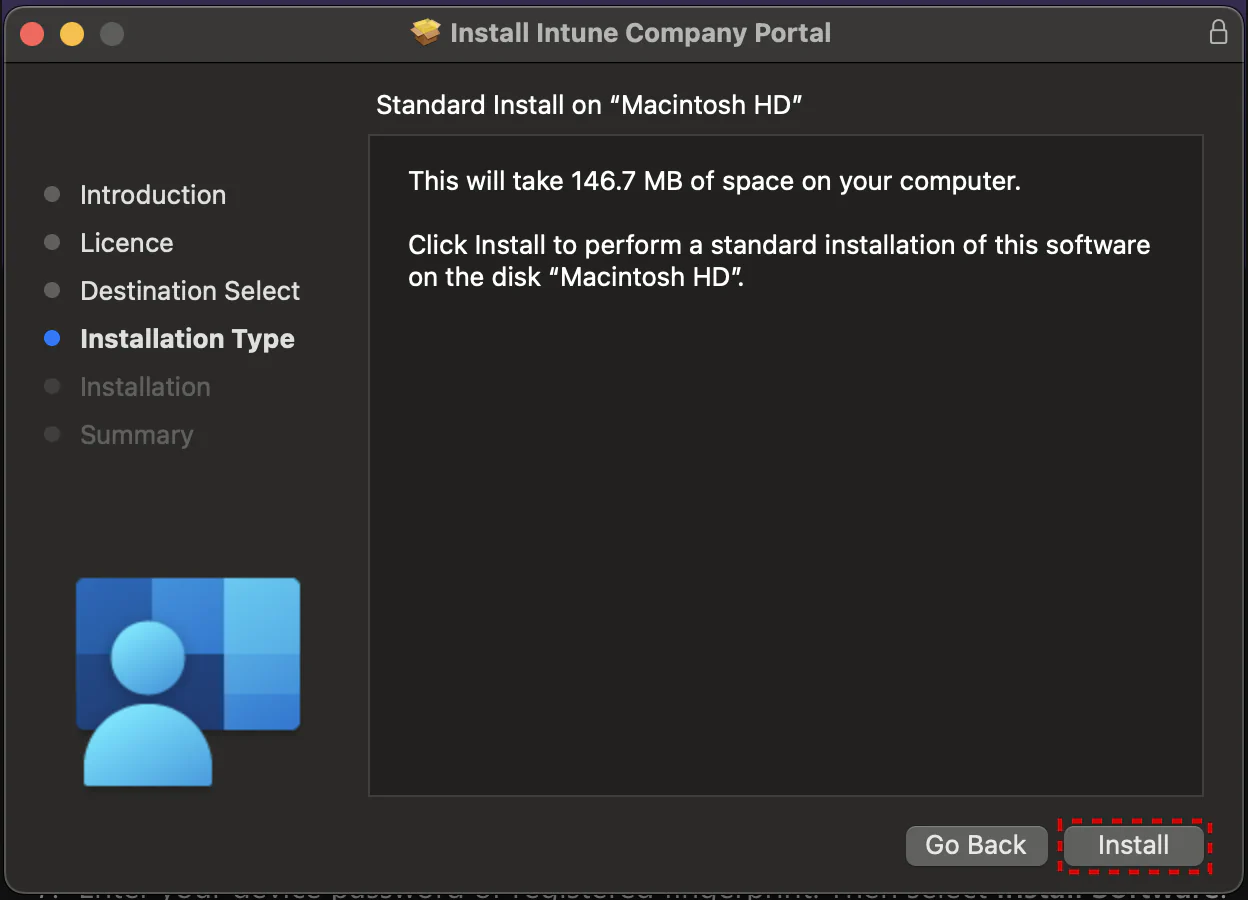
7. Enter your device password or registered fingerprint. Then select Install Software.
8. Wait for Company Portal to finish installing.
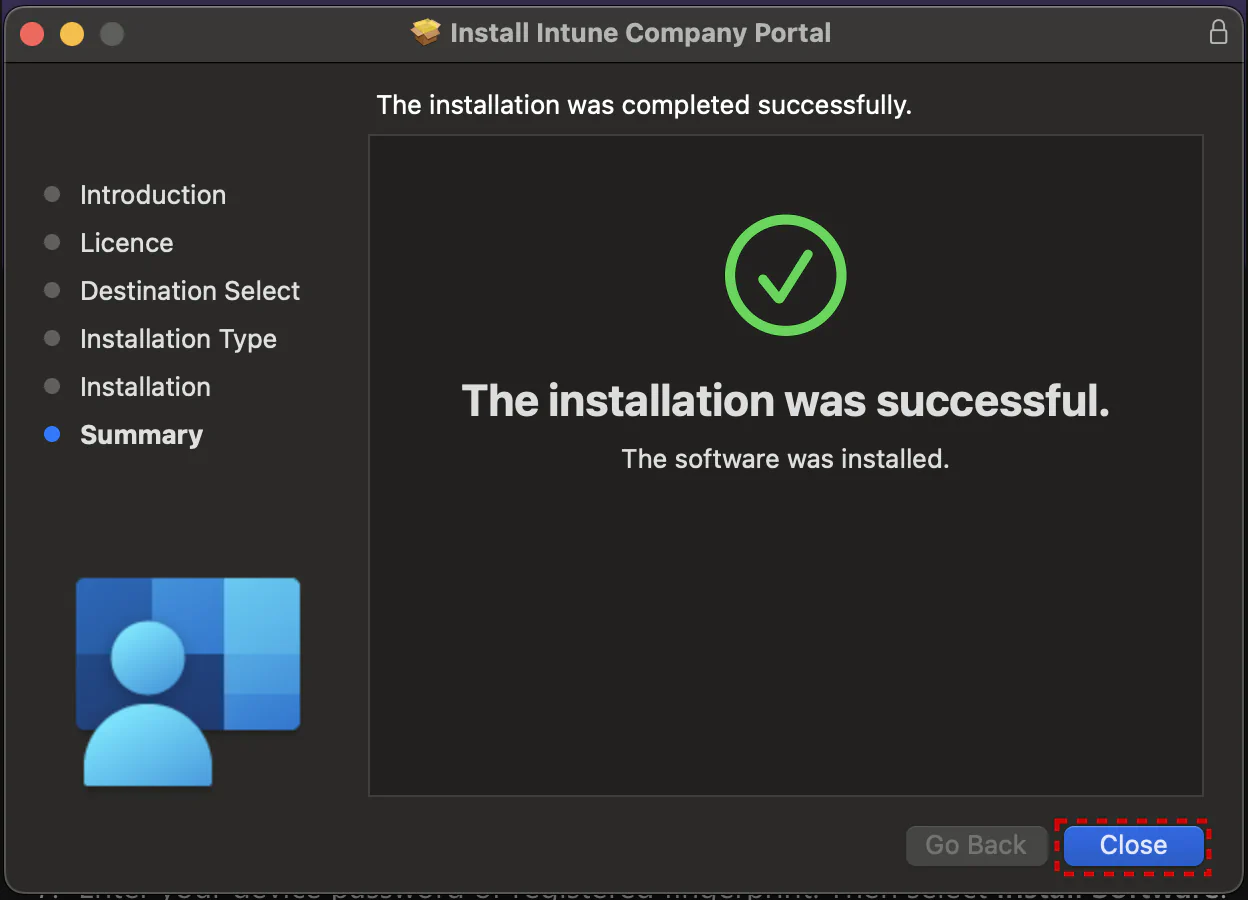
9. Open the Company Portal app.
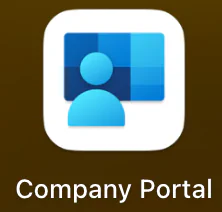
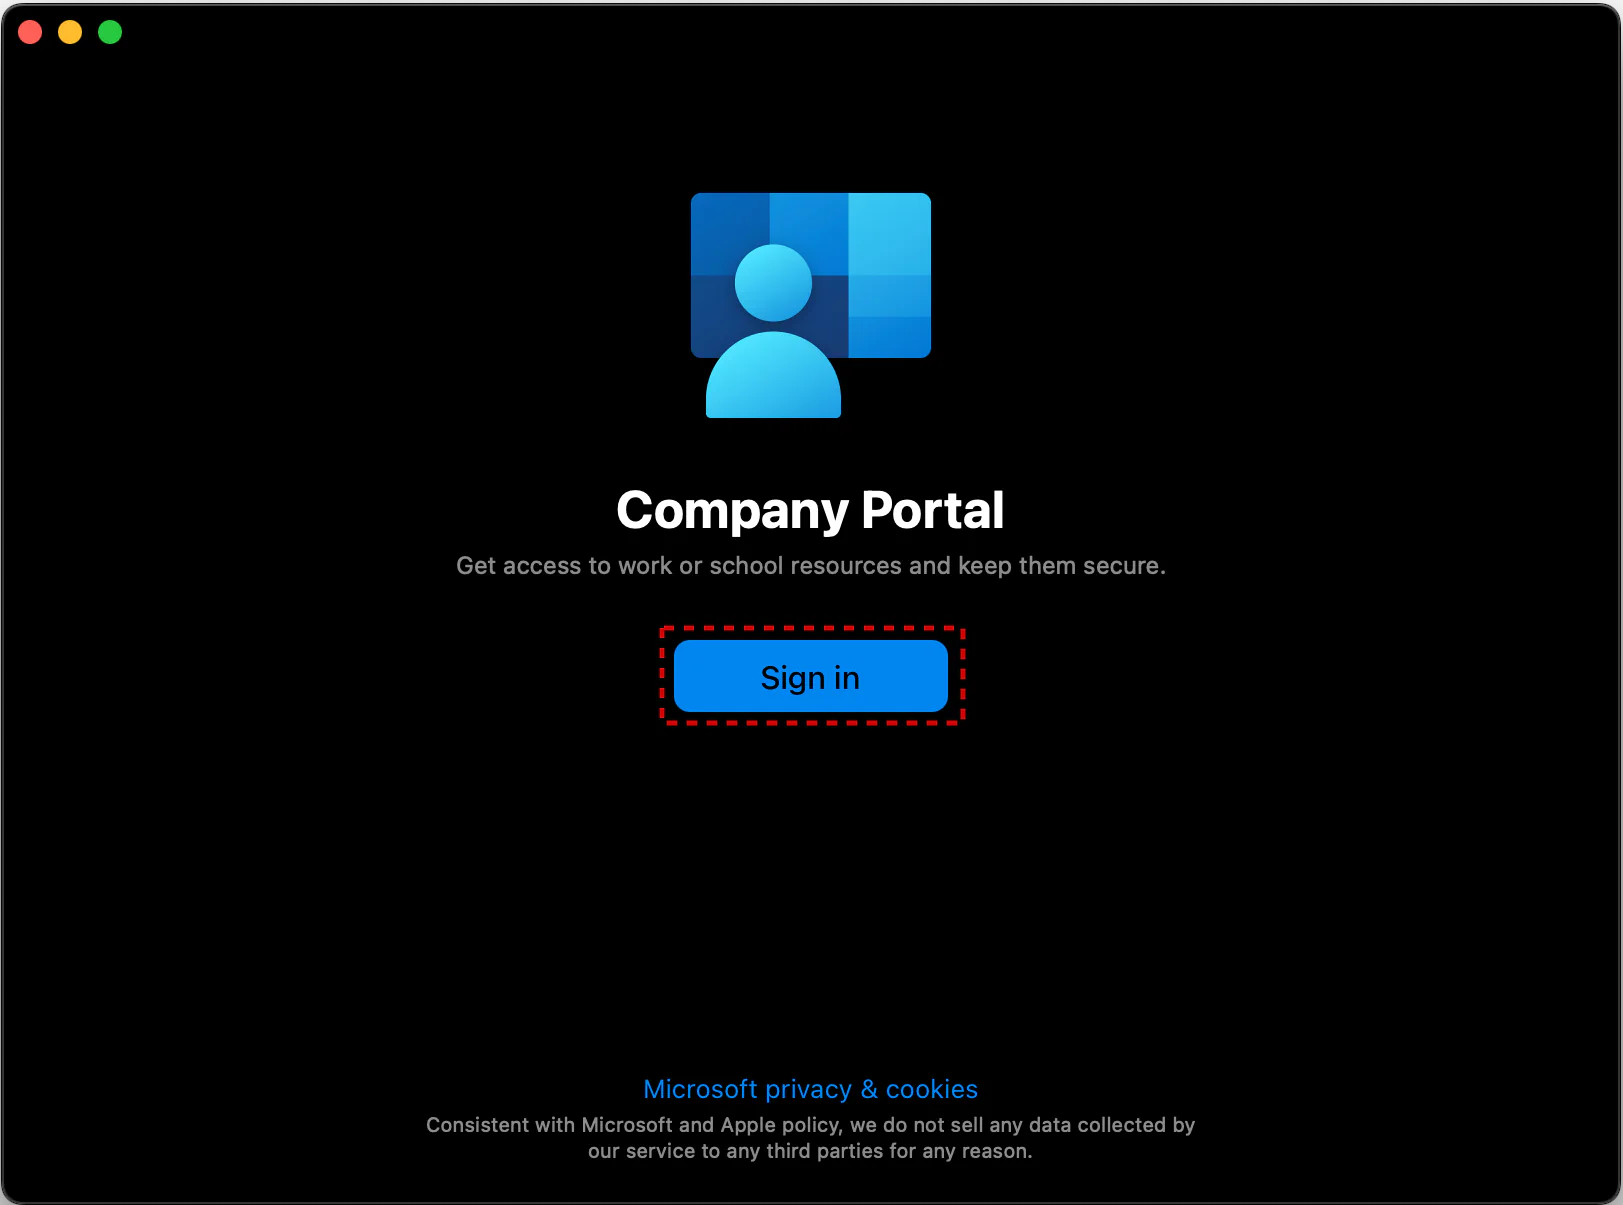
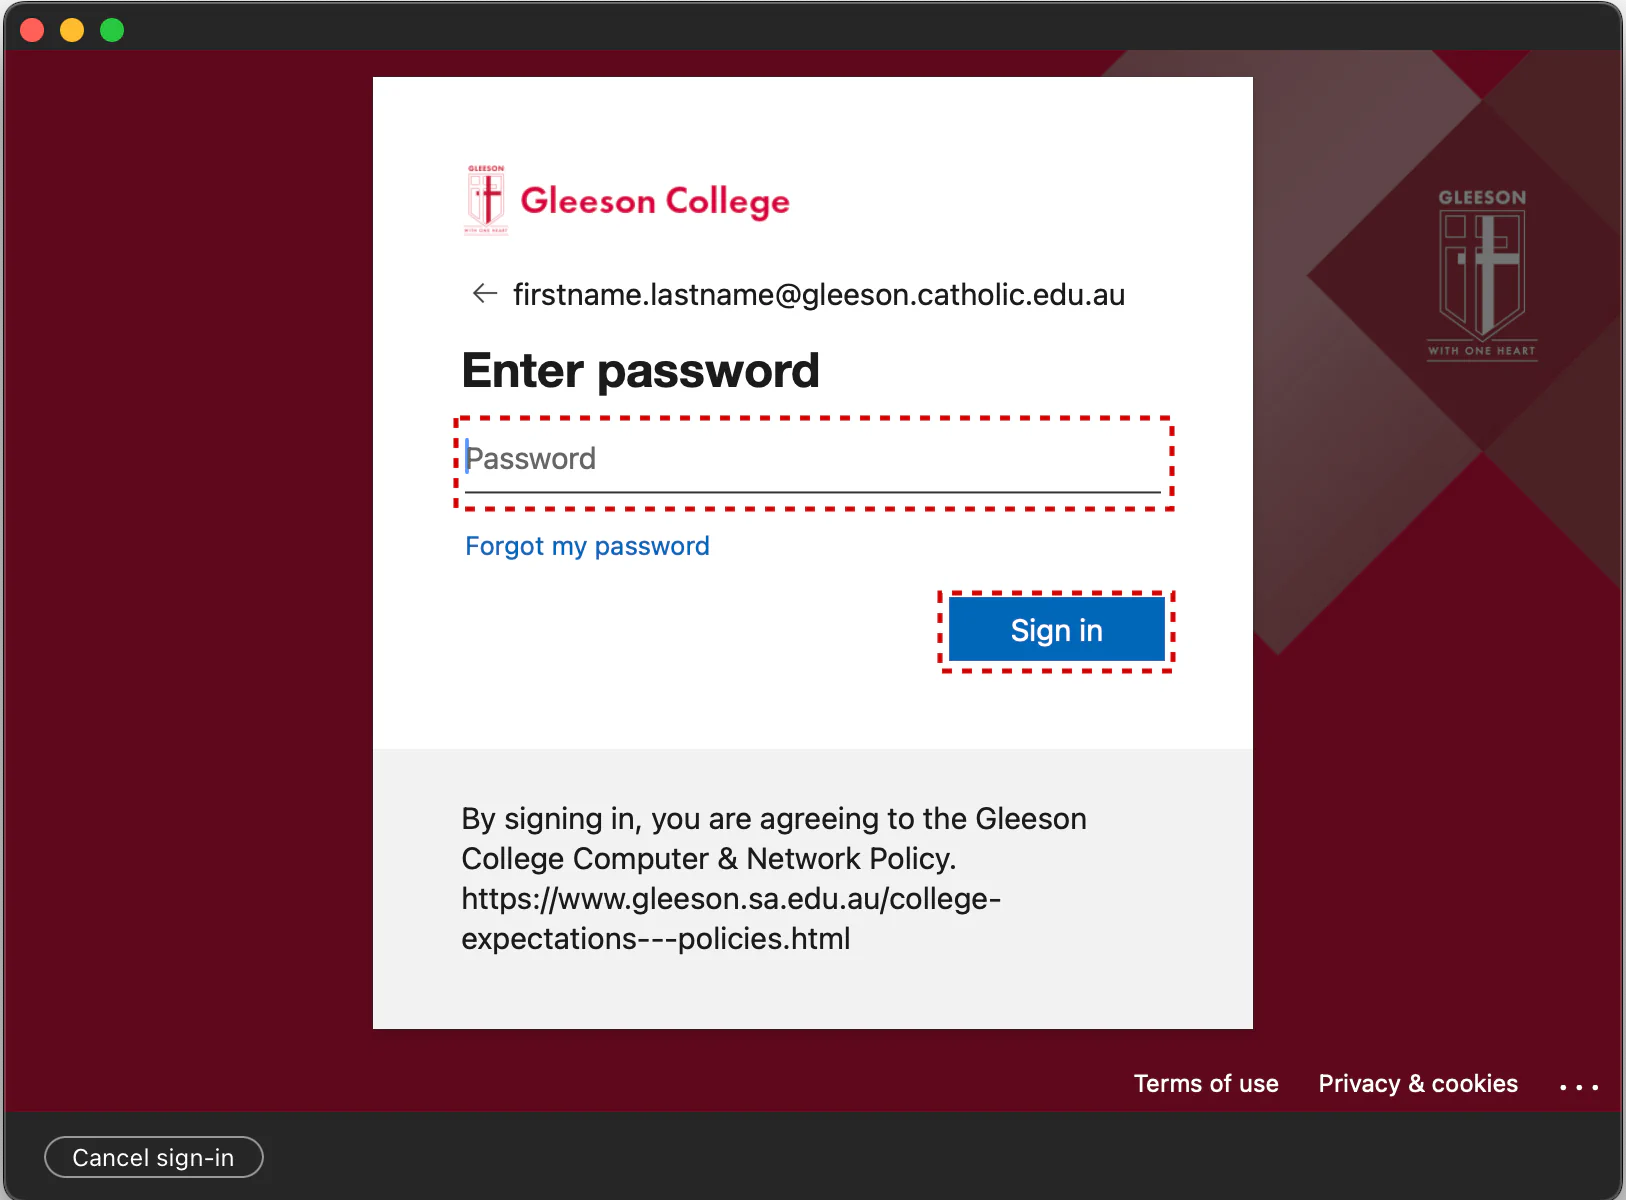
1. Sign into the Company Portal app with your Gleeson College account.

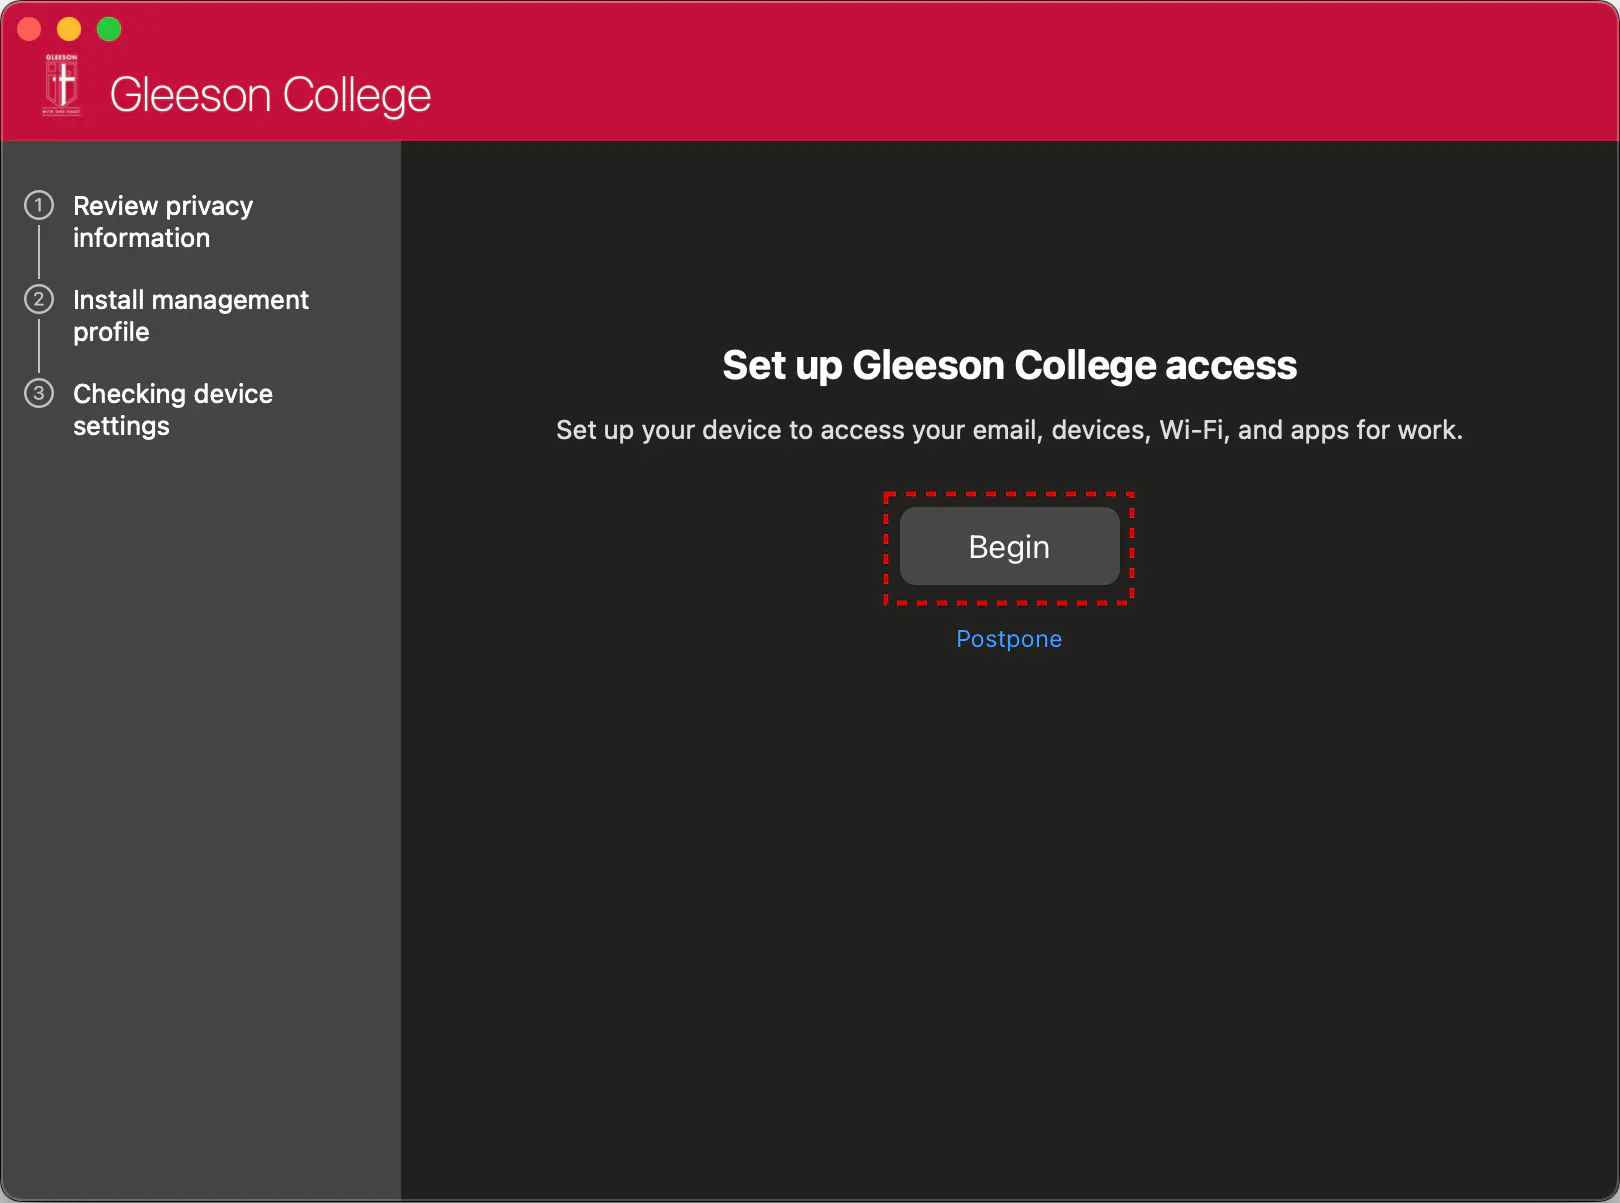
2. On the Set-up access page, select Begin.
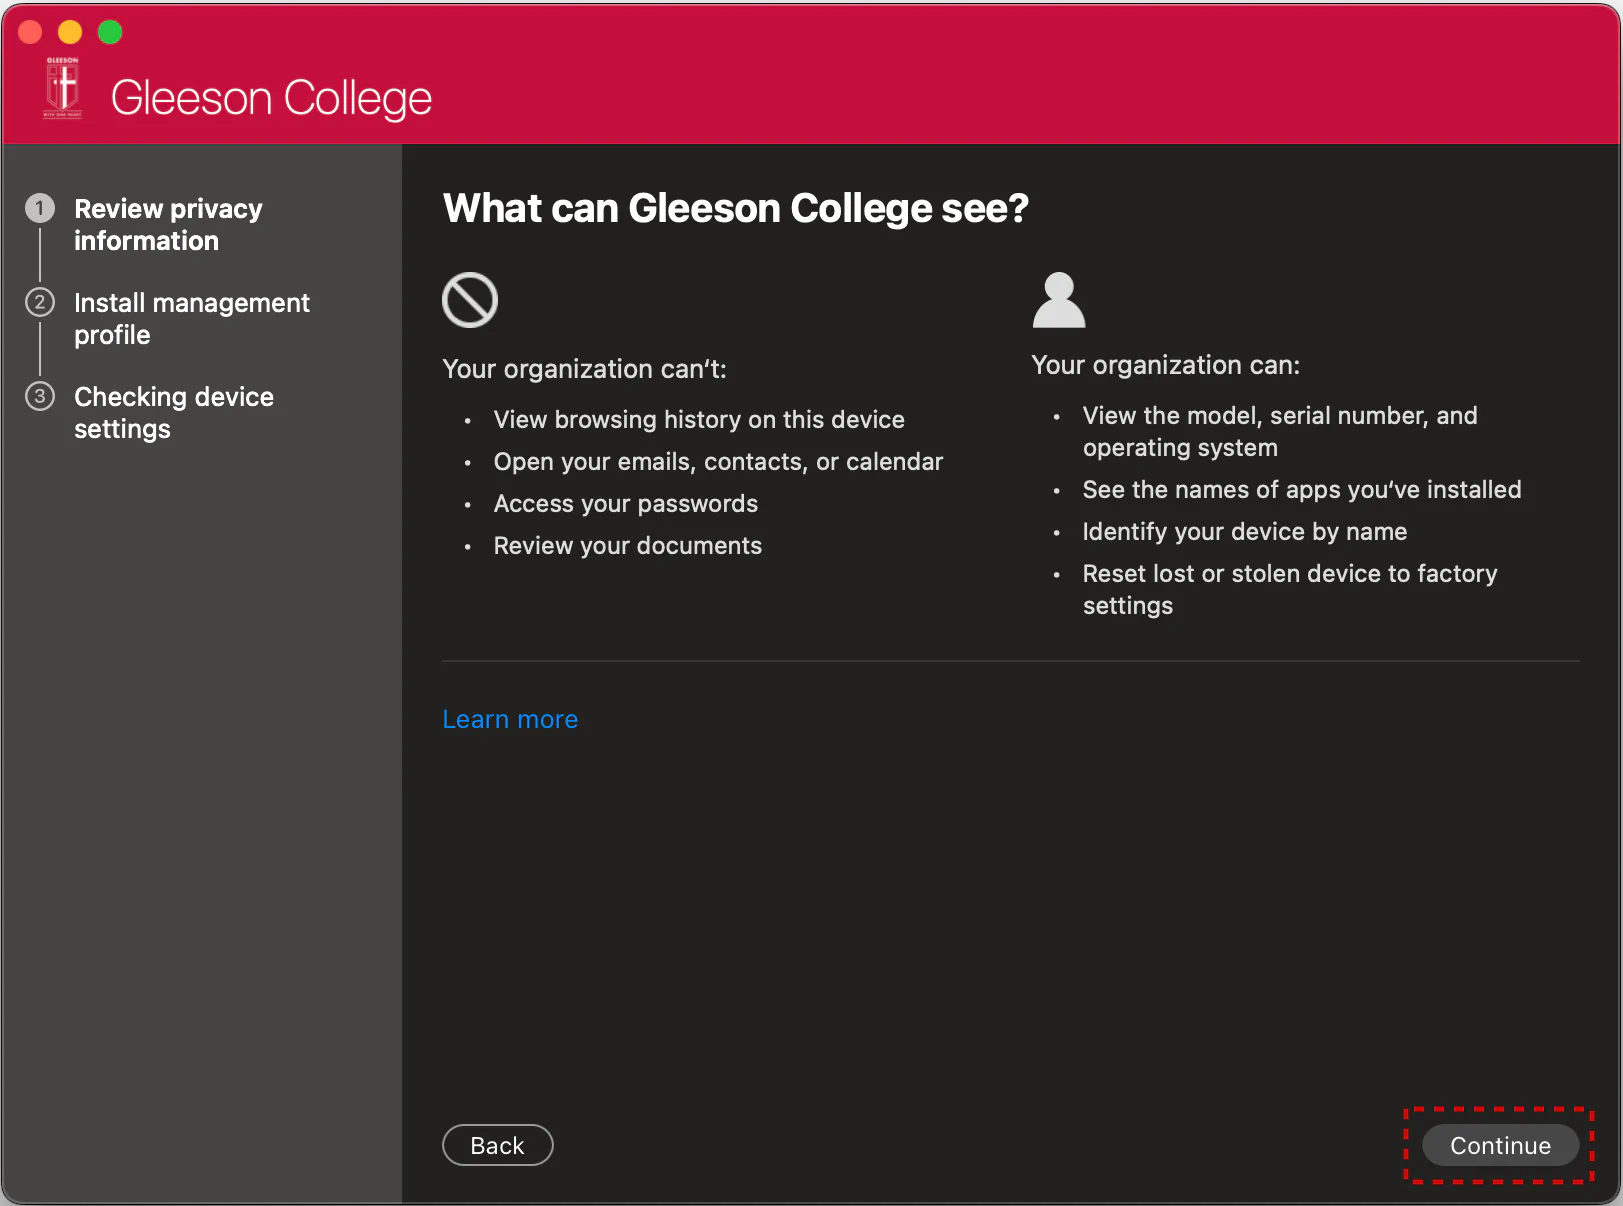
3. Review the privacy information. Then select Continue.
4. On the Install management profile page, select Download profile.
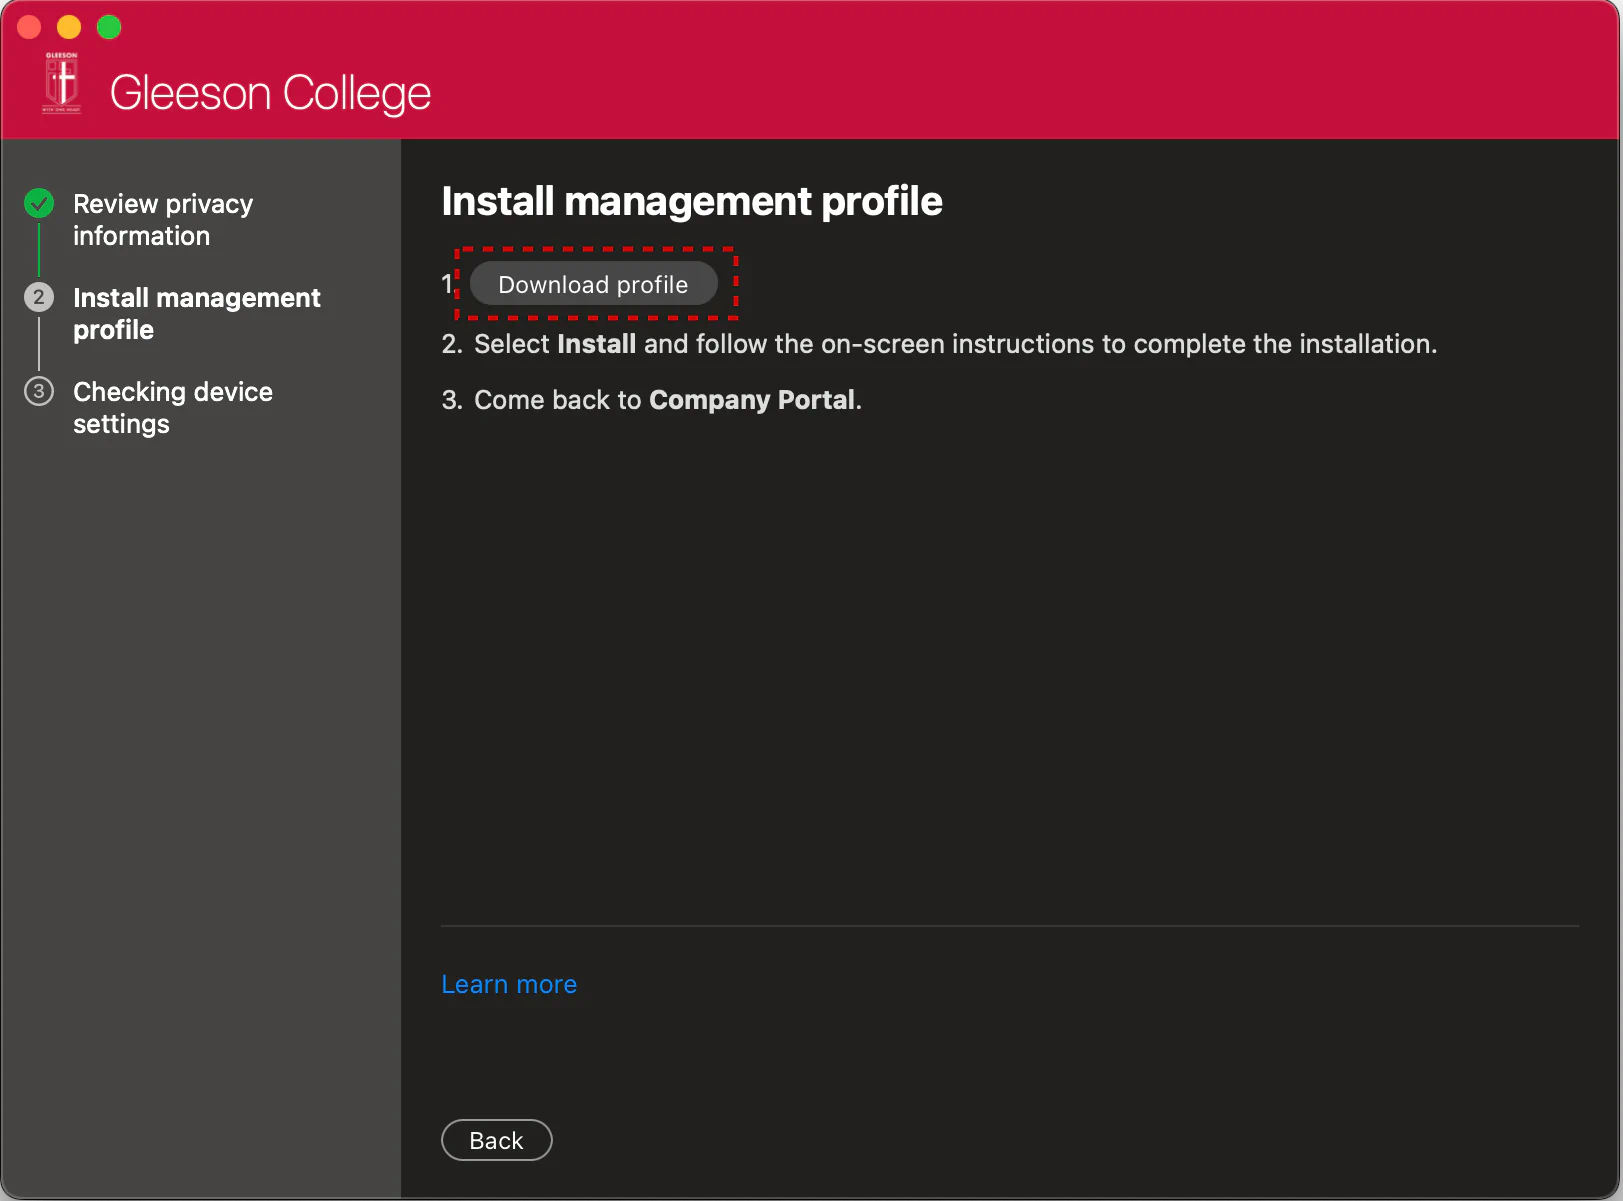
5. Your macOS system settings open in a new window. The management profile you just downloaded is shown.

6. Double click the profile to open it. Select Install…
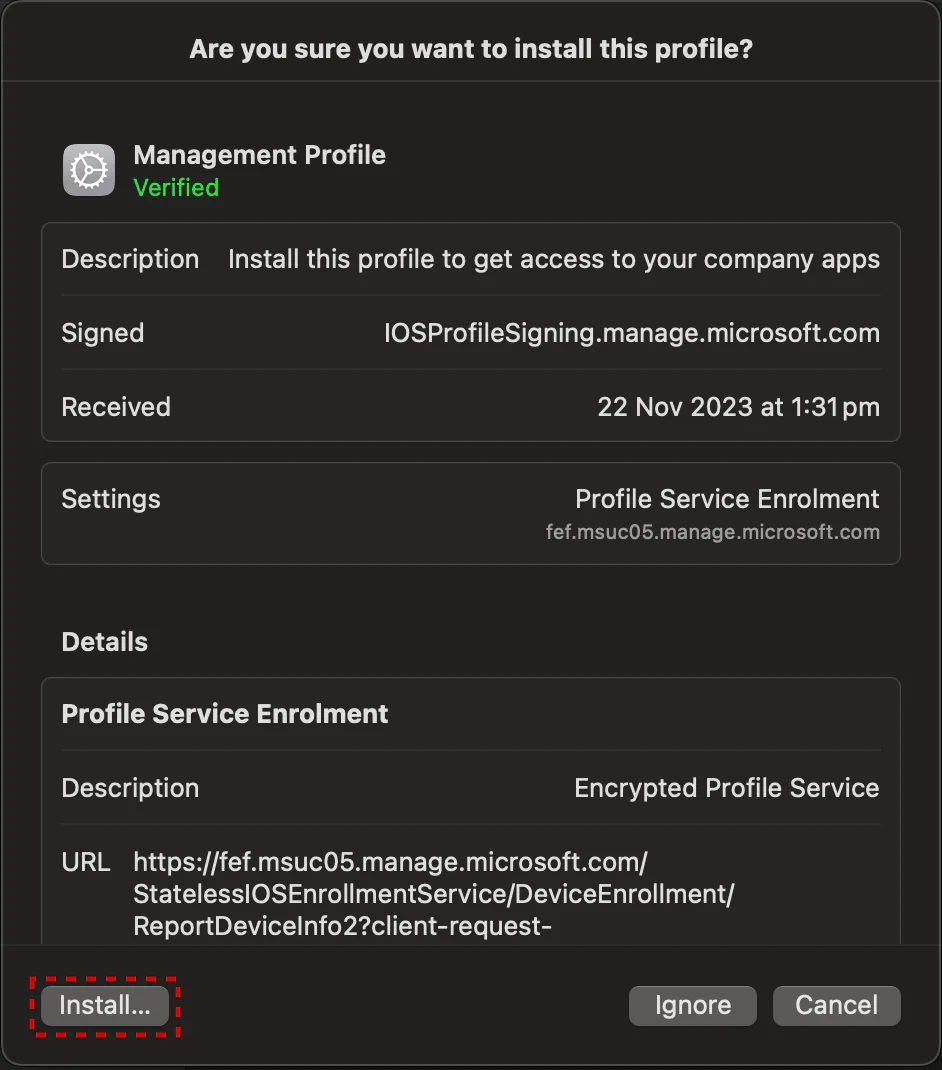
7. When asked to confirm installation, select Install.
8. Enter your device password to allow the profile to enrol your device. Then select Enrol.
9. Wait while the management profile installs and then enrols your device.
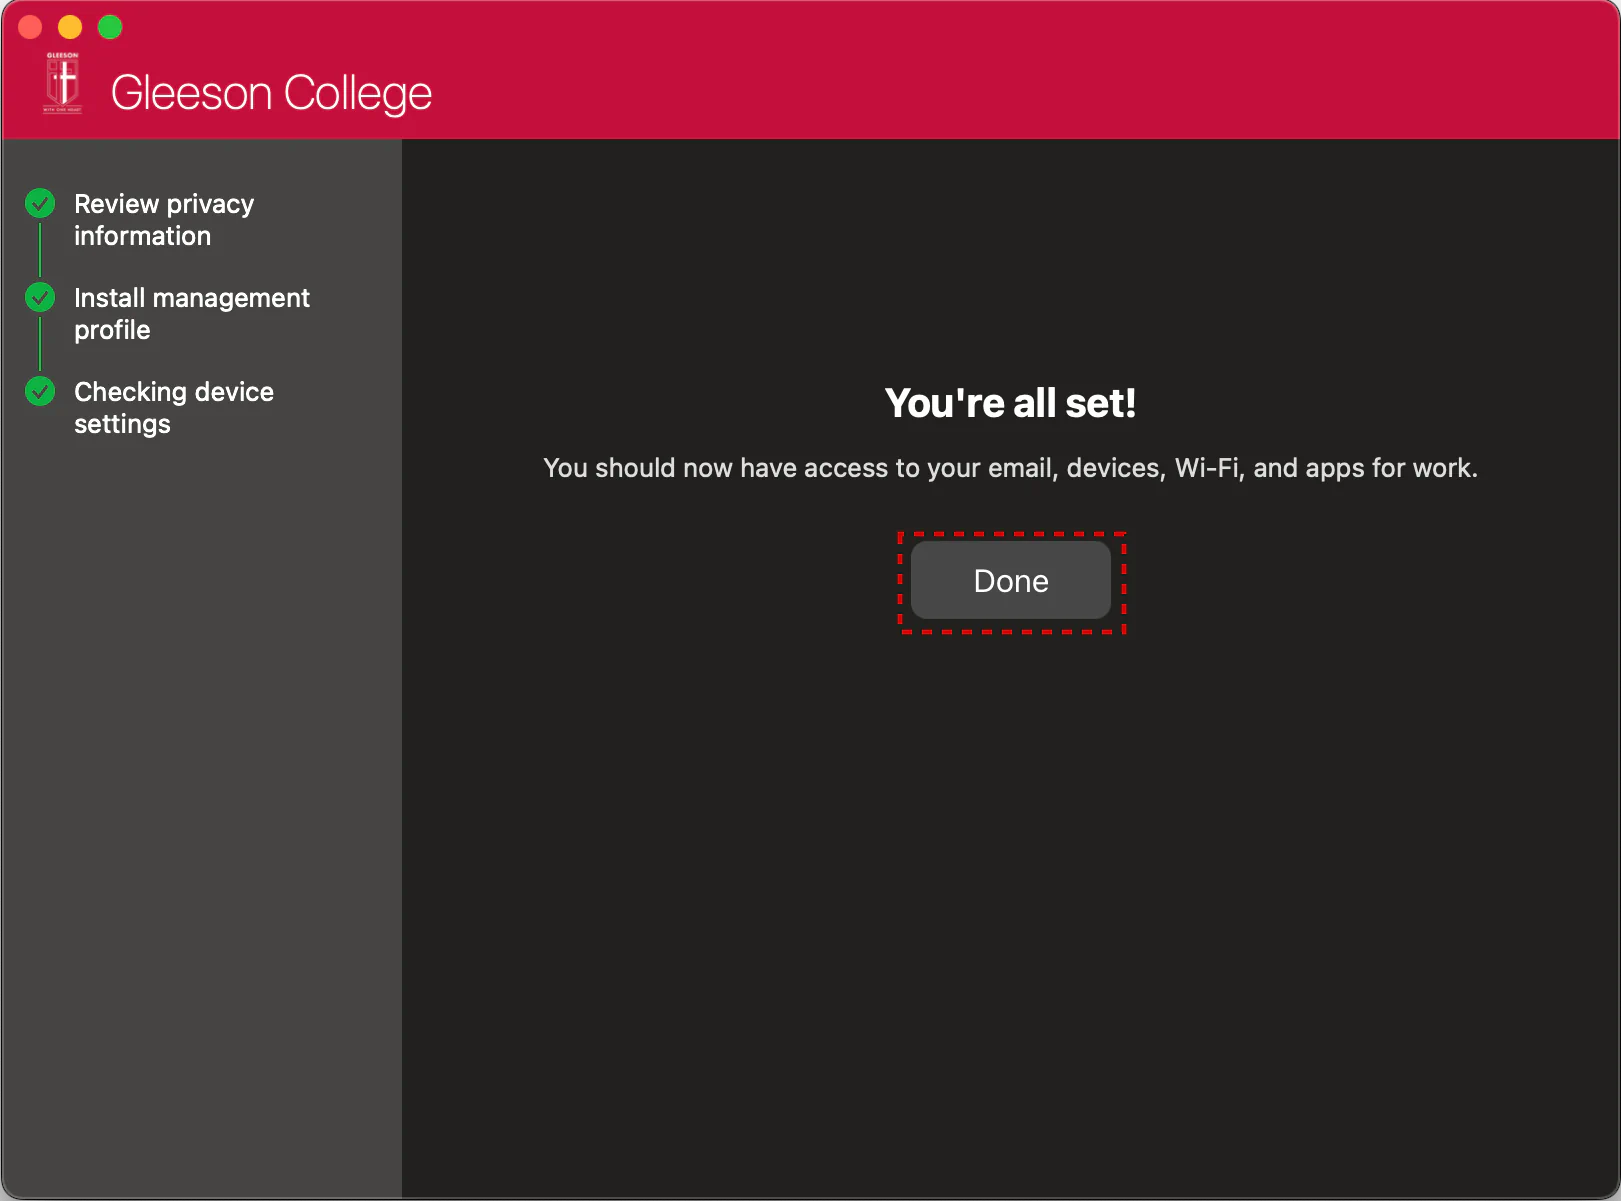
10. Return to the Company Portal app and verify that there is a green checkmark next to Install management profile. When setup is complete, select Done. Your device is ready to use for School.
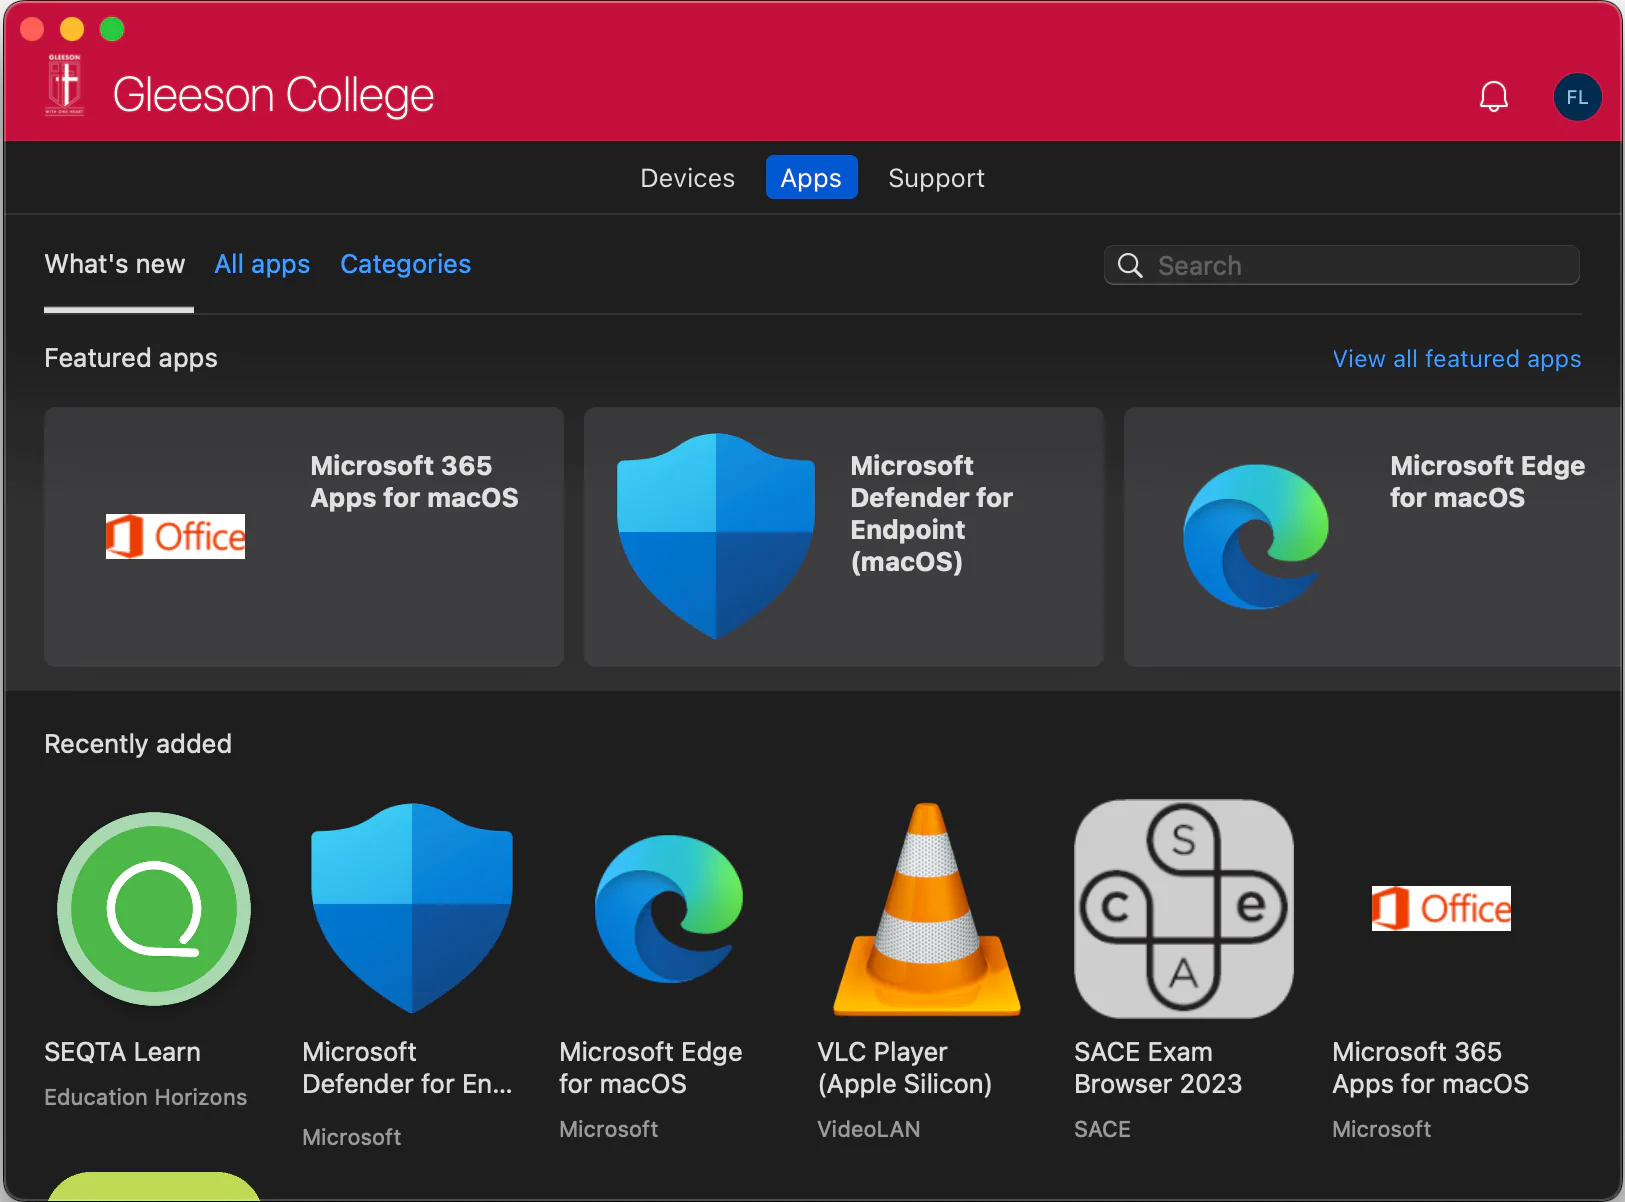
11. You can go to Devices in the Company Portal app to view and manage your enrolled Mac. Here you can also install some Apps provided by Gleeson College.
Gleeson College Students get access to 1TB of Cloud Storage with OneDrive. Follow these steps to login to OneDrive
1. Open the App Store and search for OneDrive and install it

2. Once installed, open the OneDrive app.
Type in your Gleeson Username and click Sign In, then your Gleeson Password and click Sign In
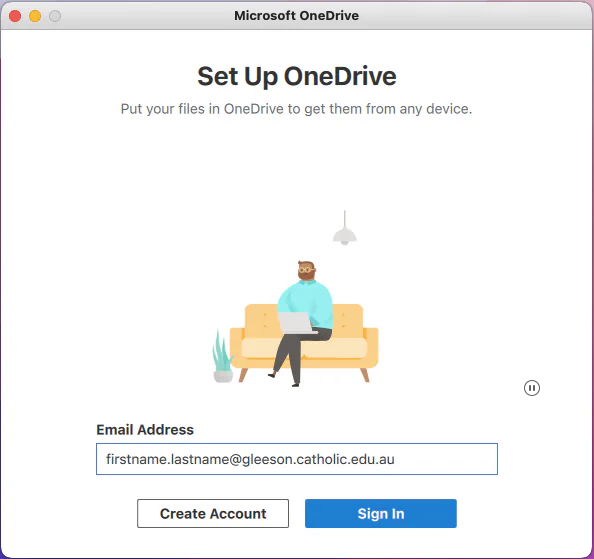
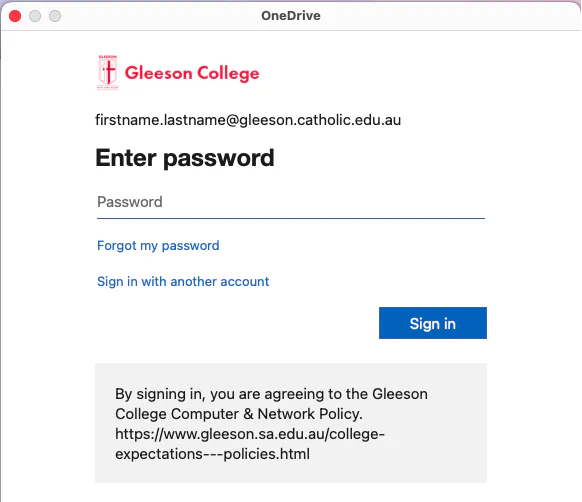
3. Click Choose OneDrive Folder Location (your Home folder should be ok). Then click Next then OK
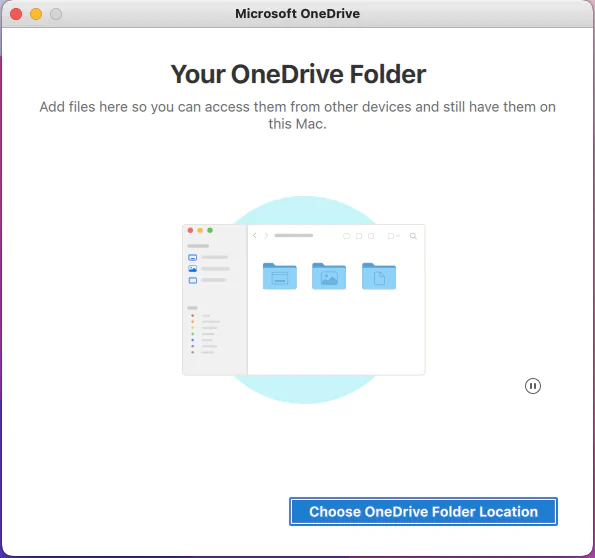
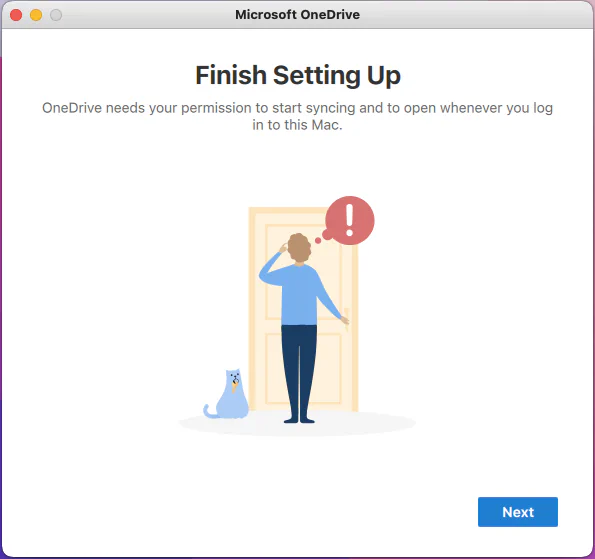
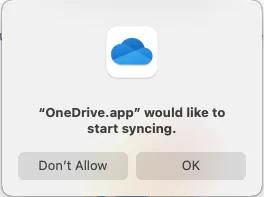
4. Click Next, Next, Next, Later, Open OneDrive Folder.
5. You’re all set!
Be sure to save all your school work into your OneDrive so that it’s backed up to the cloud.
To login to SEQTA visit https://learn.gleeson.catholic.edu.au and login with your Gleeson Account.
Join us on a College Tour
We warmly invite families to join us for a College Tour and discover the benefits of over 30 years of Catholic co-educational excellence.